What's this lesson all about?
The purpose of this lesson is to help adjust student conceptions about how heat gets transferred, focusing primarily on heat transfer through convection. Many students who take the TCE show a misconception that heat only travels upward, that “heat rises”, and that heat and cold flow like liquids (Yeo & Zadnik, 2001).

This lesson starts by challenging those conceptions through a discrepant event, followed by exploring three simulations involving cups and convection. By the end of this lesson students should have a much more nuanced understanding of heat transfer in fluids like air.
This lesson should take place after the TCE Pre-Test and, ideally, after Lesson 1 - Thermal Equilibrium and Lesson 2 - “Hot” and “Cold”.
This lesson should take place after the TCE Pre-Test and, ideally, after Lesson 1 - Thermal Equilibrium and Lesson 2 - “Hot” and “Cold”.
Quick Assessment of Student Understanding
Have students complete the three quick questions at the beginning of this Google Doc.
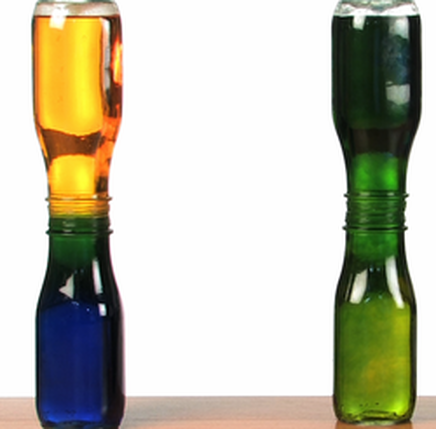
Introductory Physical Activity/Demonstration - Convection Conundrum
|
This demonstration should hopefully get students thinking about how the motion of fluids is affected by temperature, as well as initiate a density-related discussion about why fluids tend to travel upwards when warmed.
Materials: 4 empty identical bottles, food coloring, playing cards, hot & cold water
|
|
Watch a demonstration of the activity below! (1m01s)
Activity adapted from The Lab (2018).
Activity - Exploring Heat Transfer using Three Energy2D Simulations of Cups
At this point students are familiar enough with Energy2D to be able to work more freely and independently with less teacher support. Facilitate students exploration of the three simulations below and encourage them to record, reflect on and discuss their thoughts and observations in the accompanying Google Doc.
Note: The colouring in these simulations is the temperature of water or air, and not an amount of heat.
Note: The colouring in these simulations is the temperature of water or air, and not an amount of heat.
Simulation 1 - Open vs. Closed Cups
Open hot-water-cup-open-vs-closed.e2d in Energy2D. This model simulates the heat losses from two cups of hot water, one being covered the other closed. Only a part of the cups is modeled. Convection in the water is not considered.
- Which cup cools the fastest? Why?
- Do the cups reach thermal equilibrium with the air? Discuss.
- Set the temperature of the water on the right to 0° C, keeping the temperature on the left at 50° C, and run the simulation. Discuss what has changed.
- Consider how heat is transferred through:
- the air above the cup on the left.
- the lip of the cup on the left.
- the air above the cup on the left.
- Consider how heat is transferred through:
- Set the temperature of the water on the left to 0° C and set the temperature on the right back to 50° C, and run the simulation. Discuss what has changed.
- Consider how heat is transferred through the air above the cup on the right.
- Do you agree that “heat only travels upward”? Why or why not?
- Suppose you are told “heat flows like a liquid through all materials”. Would you agree, or disagree? Support your argument with reference to heat transfer through air and the cup’s lid.
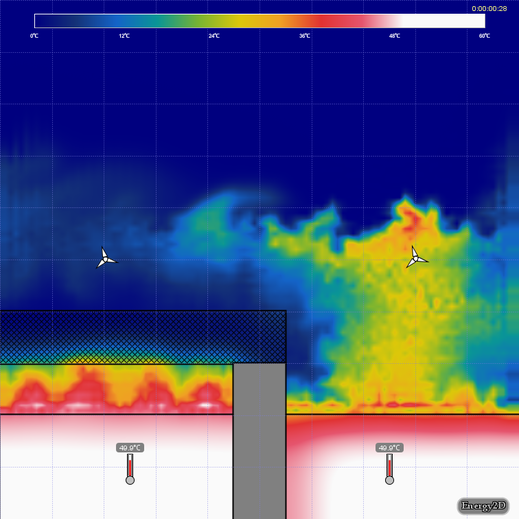
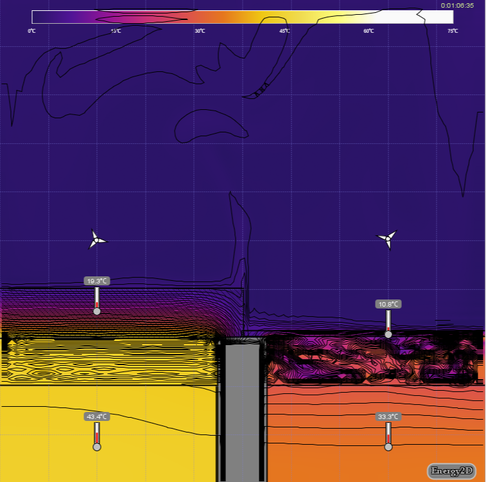
Simulation 2 - Cups with Lids of Different Thermal Conductivity
Open hot-water-cup-conductivity.e2d in Energy2D. This model simulates the heat losses from two cups of hot water covered by two sheets of materials that have different thermal conductivity. Only a part of the cups is modeled. Convection in water is not considered.
- Which cup of water cools more quickly, the cup on the left or the right? Discuss with reference to thermal conductivity.
- Which lid conducts heat energy away from the cup the quickest?
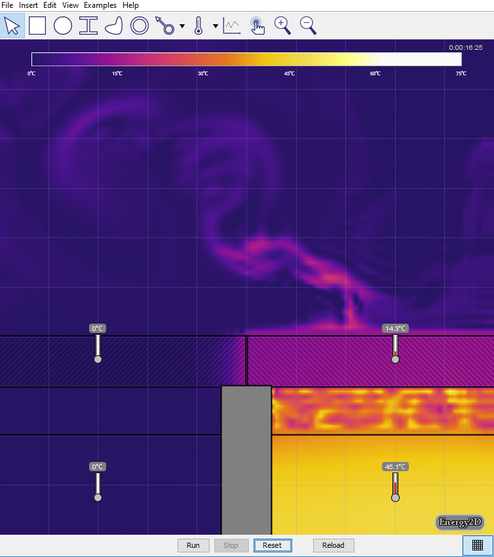
- Set the temperature of the water on the right to 0° C, keeping the temperature on the left at 50° C, and run the simulation (see the image below). Discuss the effect this has on the temperature, the time it takes for heat to be transferred, and motion of the air above the lids.
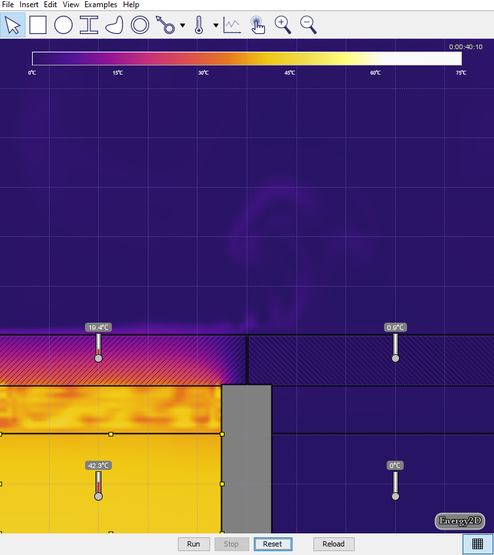
- Set the temperature of the water on the left to 0° C and set the temperature on the right back to 50° C, and run the simulation (see the image below). Discuss the effect this has on the air above the lids.
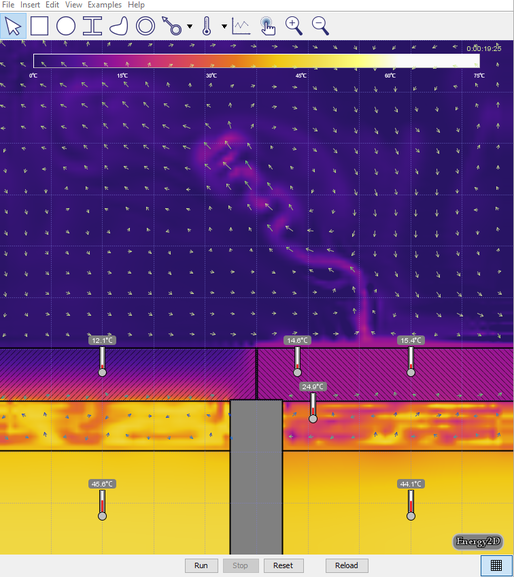
- Turn on Velocity in the View menu. Run the simulation for 5 or 10 seconds then click Stop (see the image below). Generate a relationship between the temperature of the air and the direction of travel.
- Set both water temperatures back to 50° C, turn on Heat Flux Arrows and run the simulation. Make at least 3 conclusions about heat transfer and the motion of air at different temperatures. Turning on graphs may help. Compare these conclusions with at least one other student, and present your most interesting conclusion to the class.
Simulation 3 - Cups with Lids of Different Thicknesses
Open hot-water-cup-thickness.e2d in Energy2D. This model simulates the heat losses from two cups of hot water covered by two sheets of identical materials that have different thickness. Only a part of the cups is modeled. Convection in the water is not considered.
- Which cup cools the fastest? Why?
- How is the air next to each lid affected? Does it always travel straight up?
- Which fan turns the quickest? What causes this?
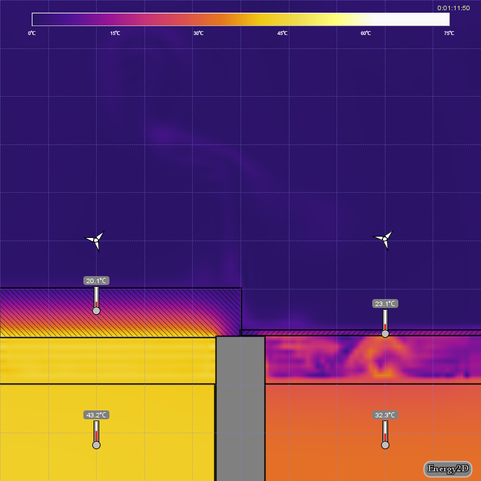
- Discuss the difference in the air trapped under the thick lid compared to the air trapped under the thin lid (see first image below). Turning on Isotherm in View Options may help (see second image below).
|
|
Suggested Exploration for All Simulations
Explore View options such as “Heat Flux Arrows”, “Streamlines”, “Isotherm”, and “Velocity” (visit watch Teacher Support and watch this video for help with this).
Summary Discussion Questions
State whether you agree or disagree with the following statements, and explain your answer with reference to an example from the simulations. If using Google Docs, screenshots are helpful.
- “Heat doesn’t rise, because heat is not a substance. Hot air rises because it is pushed upwards by cooler, denser air.”
- “Heat is only ever transferred upward.”
- “Heat and cold flow like liquids.”
And... you're done!
This concludes all three lessons.
Please have your students take the TCE Post-Test to see how they’ve improved.
Thanks so much for visiting and I hope these lessons have been helpful!
Please have your students take the TCE Post-Test to see how they’ve improved.
Thanks so much for visiting and I hope these lessons have been helpful!
Want a more traditional version of this lesson? View the Google Doc here, or download the lesson PDF here.
|
Return to the previous page.
|
Continue to the TCE Post-Test.
|
Notes:
- Please forward any feedback you have on this lesson to [email protected]. I’d love to hear what you liked, what you didn’t, what worked, what didn’t, or any modifications you’ve made!